Last Updated on 2 years by admin
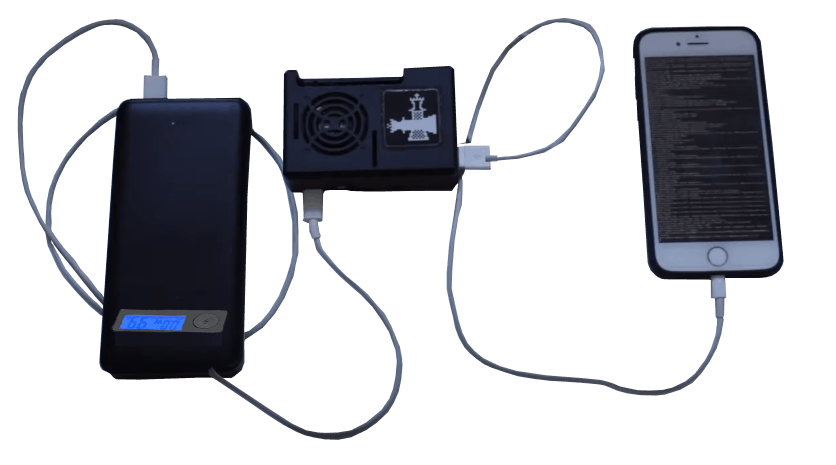
Checkra1n can now support mobility. piRa1n Jailbreak doesn’t need a PC any more to jailbreak your iPhone. Raspberry Pi 4 and a power bank is all you need. Right now, Checkra1n jailbreak tool is the only compatible tool for piRa1n
Things you may need
- Raspberry Pi 4 with 1GB or higher RAM or a Banana pi M2 Zero (1GB of RAM is sufficient for piRa1n, so why spend more)
- One USB to Type C cable if using Raspberry Pi 4 / USB to micro-USB cable for Banana pi M2 Zero
- The iPhone Charger cable (USB to lightning cable)
- 5V 3A supported Power Bank
- 8GB or higher capacity Micro SD Card
Step Guide
Step 1. Choose based on the device that you use
- For the Raspberry Pi 4: Download the Raspberry Imager and install Raspbian “A port of Debian with the Raspberry Pi Desktop (Recommended)” on your MicroSD Card
- If the device that you use is Banana pi M2 Zero: Download Raspbian image and burn it on your MicroSD using balenaEtcher
Step 2. Turn on the Raspberry Pi 4/Banana pi M2 Zero after plugging the MicroSD Card. Make sure to have the monitor, a mouse and a keyboard plugged in.
For detailed information, follow the guide from Step 3 onward.
piRa1n Jailbreak Installation
- Open Terminal Window
- Copy below command
cd /home/pi && git clone https://github.com/raspberryenvoie/piRa1n.git && cd piRa1n && sudo chmod +x install_piRa1n.sh && ./install_piRa1n.sh - Paste on the command window and hit enter
Now the Checkra1n Dongle is ready for Jailbreaking.
Attention – Always take a backup then proceed with the jailbreak.
If you are ready to piRa1n jailbreak, connect Power Bank with Raspberry Pi 4/Banana pi M2 Zero using Type C or Micro USB Cable.
Power the iPhone in DFU mode and stay back and relax piRa1n will do the rest.
Once the Jailbreak process completes Pi device powers off, now you can unplug the power cable from the power bank and carry it anywhere.
How to update Checkra1n Dongle
Make sure your piRa1n box has a stable internet connection, and a new version of Checkra1n is available. If the answer is Yes for the above, then execute below command.
cd /home/pi/piRa1n && ./update_checkra1n.sh
Disable the Pi from shutting down after each jailbreak
This feature is important if you need to jailbreak more than one device at a time.
Disable Shutdown – Run this command: cd /home/pi/piRa1n && ./piRa1n_no_automatic_shutdown.sh
Restore settings – Automatically shut down Pi after every Jailbreak): cd /home/pi/piRa1n && ./piRa1n_automatic_shutdown.sh
Uninstall piRa1n
Use the command: cd /home/pi/piRa1n && ./uninstall_piRa1n.sh
Following articles may be useful:
Checkra1n iOS 13 Jailbreak Compatible Jailbreak Tweaks – Article 01
*Checkra1n iOS 13 Jailbreak Compatible Jailbreak Tweaks – Article 02
Checkra1n iOS 13 Jailbreak Compatible Jailbreak Tweaks – Article 03
Unc0ver jailbreak added iOS 13 – iOS 13.3 Jailbreak A9-A11 devices support
Apple has released iOS and iPadOS 13.4 with iPad trackpad and mouse support
One thought on “piRa1n Jailbreak – Convert Raspberry Pi 4 into a Checkra1n Dongle”
Leave a Reply
You must be logged in to post a comment.


I’m the developer thanks for this article! If someone needs help check these links: https://github.com/raspberryenvoie/piRa1n
https://www.reddit.com/r/jailbreak/comments/g7sj3d/release_pira1n_easily_turn_a_raspberry_pi_into_a/