

Last Updated on 4 years by admin
Meraki System Manager is a total solution for your Mobile device management. It supports Android for work as well as iOS for work. In simple both iOS & Android for work has the same concept. Both providers support mobile devices with work applications. However, we need to use a Mobile Device Management (MDM) application to simplify the process. And that’s where Meraki MDM comes in.
We are sure everyone with an IT background knows what Meraki is. But if you don’t, Meraki is an IT Company based in San Francisco that handles cloud-management. And has a wide range of products. Meraki was acquired by Cisco Systems in December 2012.
Get Started with Meraki System Manager / Meraki MDM App
Before going ahead, we need to keep you informed this is not a free application, and we are not promoting it. But since it is a reliable and simple solution for your mobile management we thought of sharing.
Meraki System Manager / Meraki MDM free for 14 days. Which is more than enough for testing out your devices and required applications. If you are interested in knowing the meraki mdm pricing check here — https://meraki.cisco.com/buy/cost-calculator#mobility.
Though iOS and Android both have support for work profiles through Meraki, this post is about Android for Work. This is also known as Android Enterprise.
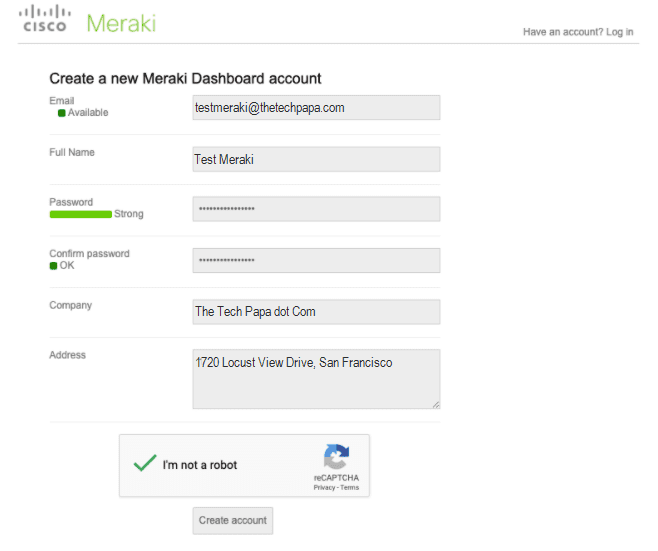
Step guide on how to get your Meraki Dashboard Account
- Access the link — https://dashboard.meraki.com and select create account.
- Select the region according to your organization’s location. This information cannot be edited therefore provide accurate information.
- Update the requested information.
- Finally, select create an account from the bottom of the screen.
Once you get through the above process you will get access to the dashboard, please make sure to get the 14-day trial activated.
Adding Devices to Meraki Dashboard
In this step we will be showing how to add your devices into the Meraki Dashboard. Though we focus on adding Android devices, this option is available for other devices as well. Example — Windows, iOS…etc. Note — recommended resetting your android device and starting fresh. however, if you are planning to bring your own device / personal device for work then resetting is not required. this is also called BYOD.
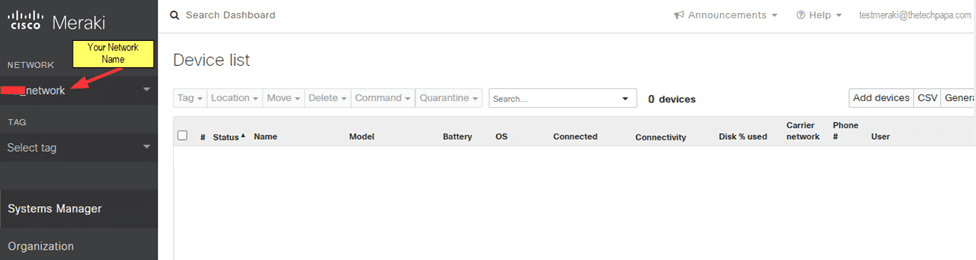
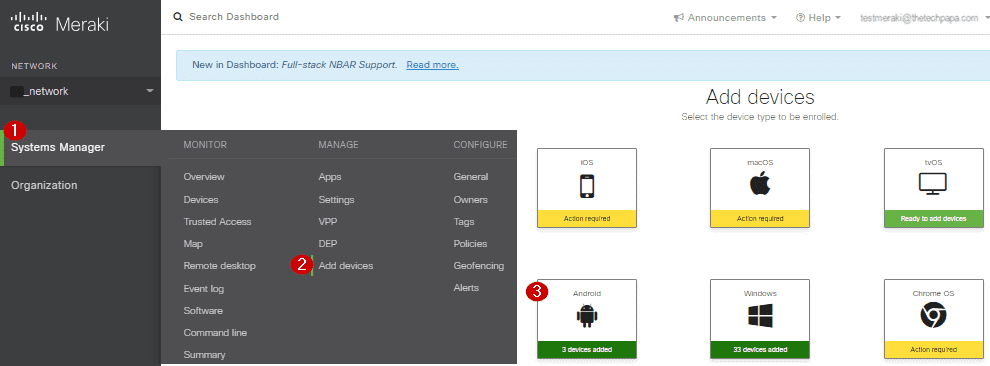
- Go to the Meraki dashboard and look for “Systems Manager” in the left-hand pane.
- Under “Systems Manager” go to “Add Device”.
- Click on “Android”. Follow the numbers in the picture guide.
- Select V5 or V6 based on the Android version.
- Next, select one option from the list as shown. We will be using a Samsung Tab to connect with the Android for Work. So, option one is the right choice for us. You can choose accordingly.
- Work profile — Android Enterprise or Knox enrollment.
- Device Owner Mode — Android Enterprise.
- Knox enrollment.
- Once you select the appropriate option you will get a QR code and a Numeric code.
Recommend proceeding with the numeric code as it is much easier, you don’t need to worry about the version.
Now you have completed the basic process from Meraki Dashboard.
Next you need to follow some steps on your android device. The Best way to get started is to factory reset your device and start fresh.
- Switch on your Android Device and follow the steps. Usually, the first option is the Language selection. Next, agree with the policy

- After That, select the Wireless network. Select and type the password. And proceed ahead till you reach Sign in page.
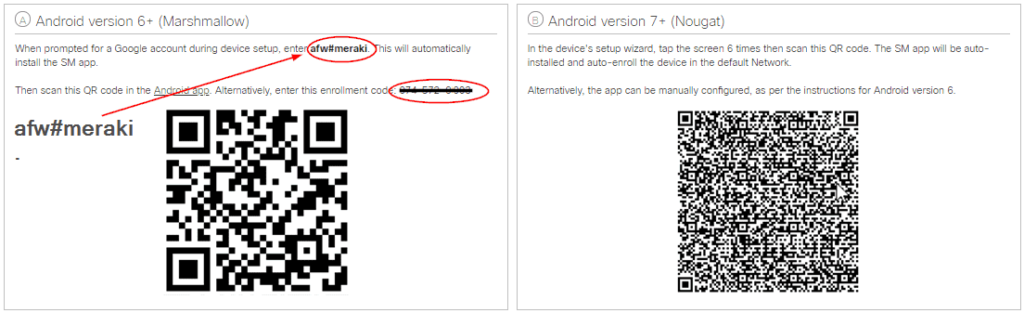
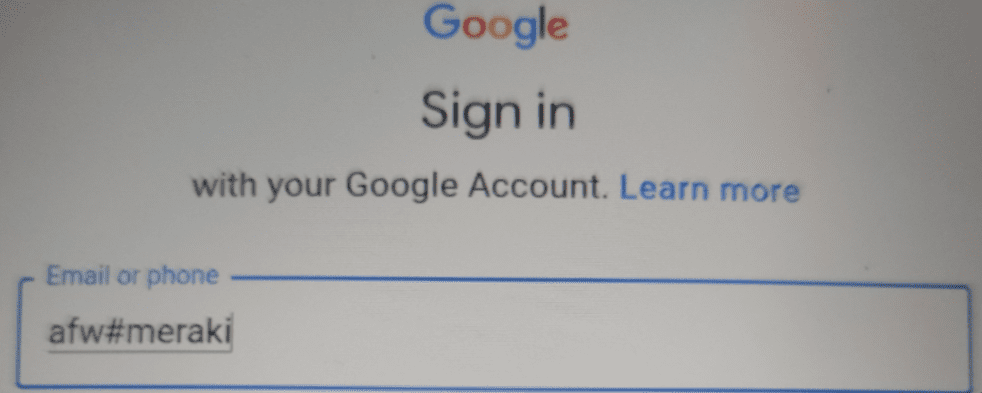
- On the Google Sign in Page type afw#meraki and hit next.
- Android Enterprise screen will appear requesting approval to install Meraki Systems Manager. This download and installs the Meraki System Manager to your Android Device

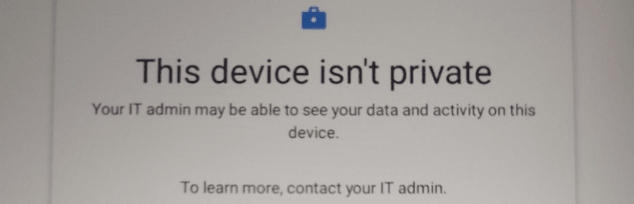
- Next, the Device displays information on the screen mentioning that the device is no longer private
- Under Google Services select required services and select Accept.
- Now the Meraki Systems Manager should open, if not you can open from the apps section.
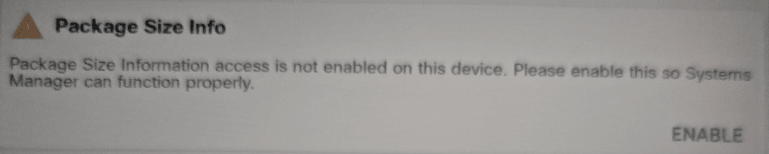
- Next, you need to provide required access for the Meraki SM to work. Check the app on your android device to identify such access requests. And proceed accordingly
- Finally, you need to provide the code that was shown in the STEP 6 in the Meraki SM app.

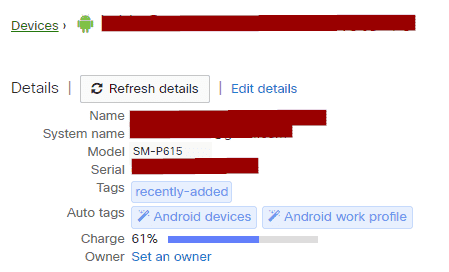
Now access the Meraki Dashboard and look for the Android Device. It will display like below.

Once you click on the device it will show the device owner, model, serial, battery percentage…etc.
Also, there are few things that you can control from the Meraki Dashboard. Such as:
- Clear Password
- Lock Device
- Erase Device
- Send Notification
- Send Beacon Alert…etc.
This completes adding the Android device to Meraki Dashboard using Meraki System Manager.
You might also like to checkout our following articles:
Manticore Jailbreak closed beta will be launching soon!
Upgrade to iOS 14.3 without SHSH Blobs
Betelguese, a single-click macOS Odysseyra1n installer
iOS 14 – iOS 14.3 Jailbreak – A lot of jailbreaks coming Soon!